

Fermcap-S is a silicon based goo that will help with keeping the foam down to a tolerable level. Basically it works the same way as rubbing your nose and then swirling around your finger in the foamy red cups you had at those college keggers. Trust me though, it works a lot better than facial oil. The substance basically breaks the surface tension so that the bubbles have a harder time to form.

The first place this stuff can be used is in your yeast starter. Most people boil the malt extract in an erlenmeyer flask directly on a burner. Just like any other liquid you are cooking on the stove, it is highly susceptible to a boil over. Put a drop or two of fermcap-s in and boil away.

Same works in the boil kettle, mine is usually filled to about an inch under the rim. Adding hops and such sometimes aggravates it and it wants to spill all over the ground...luckily 5-6 drops of fermcap-s will keep my boil rolling just under the rim and not waste any of my sweet precious wort. The above picture shows just about the time I add the drops in.
When using it for boil overs the heat and intensity will break it down where it is not a factor in the finished beer.

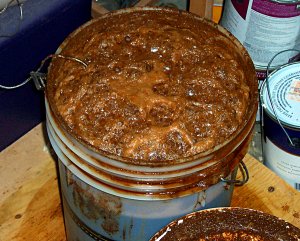
I would have to say that the most beneficial use (and I speak from experience) is using it in the fermentor to keep the krausen at bay. The above picture shows what can happen while the foamy yeast substance keeps rising and rising during an active fermentation. What you don't see is that the airlock shot clear off along with a spray of fermenting wort in all different directions. You'll often find that most homebrewers have a ceiling mopping story. The first two keys to controlling a foam issue is fermentation temperature and head space in the fermentor. Brewers might not always have these luxuries. I used to brew in a five gallon carboy in my closet, which is when I had my ceiling (and everything else) mopping incident. I then learned about blow off tubes (shown below) which helped with containing what wanted to come out but would still leave me with less beer than I started out with.

I have a mini fridge for fermenting, a larger 6 gallon carboy, and use a blowoff tube now. Before I found fermcap-s I would still have issues from time to time of very violent fermentations causing issues. I now use it in every batch of beer I brew. It is as easy as dropping about two drops per gallon of wort right after you pitch the yeast. As Ron Popeil would say "Set it and forget it." People may argue that you are putting silicon in your beer and that could be a health risk. Well it is a very small amount, plus as the bubbling slows down the fermcap-s will settle out to the bottom and get caught in the trub. As an added benefit this news article just came out and says that the silicon in beer may reduce the risk of osteoporosis.
You may also think that adding this would hurt the head retention of the finished beer. It actually has the opposite effect, since the silicon goo falls out and the beer is transferred off of it then it will not affect the foamy head later. When krausen exits through a blow off tube you also lose a lot of the naturally occurring foam stability compounds with it. So if you keep the krausen at bay and let it fall back into the fermented beer you will not lose those compounds.
If you have any issues with foam in your brew day I highly recommend trying out this product. Trust me it will save you some pain and cleaning time later down the road. You don't want to end up like these brewers below.


And lastly, here is a great time lapse photo set of a guy using fermcap-s
No comments:
Post a Comment